Guitar

F-2 schools

Groups and avatars

Overview

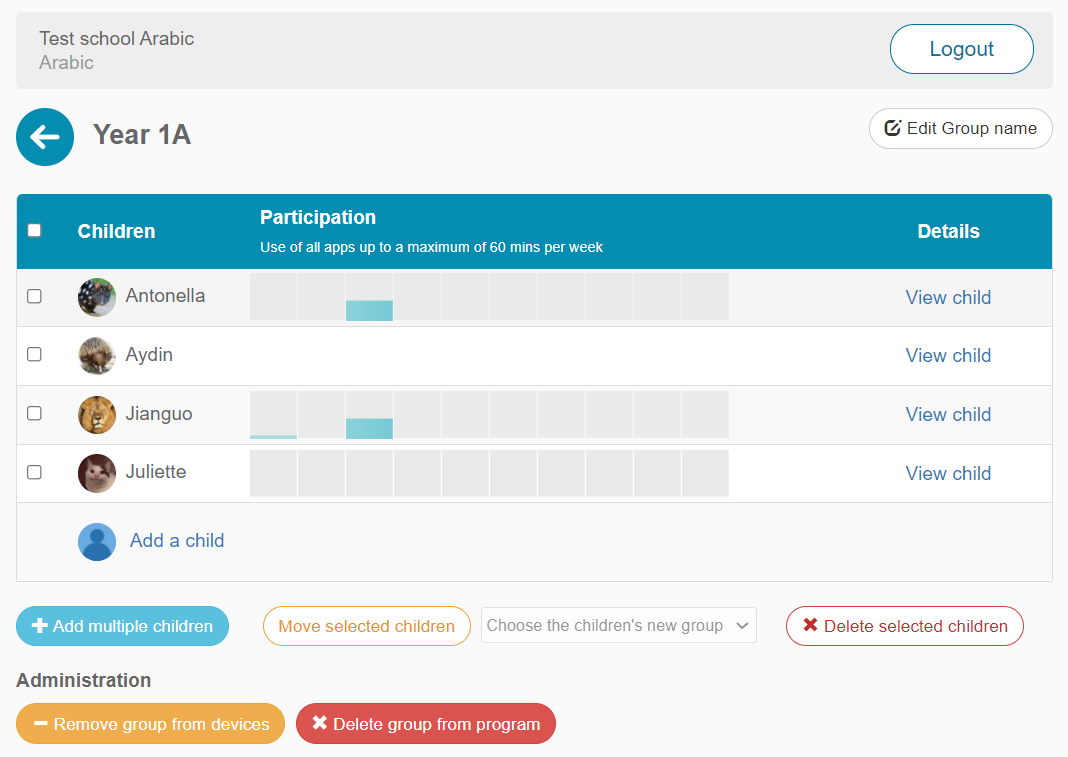
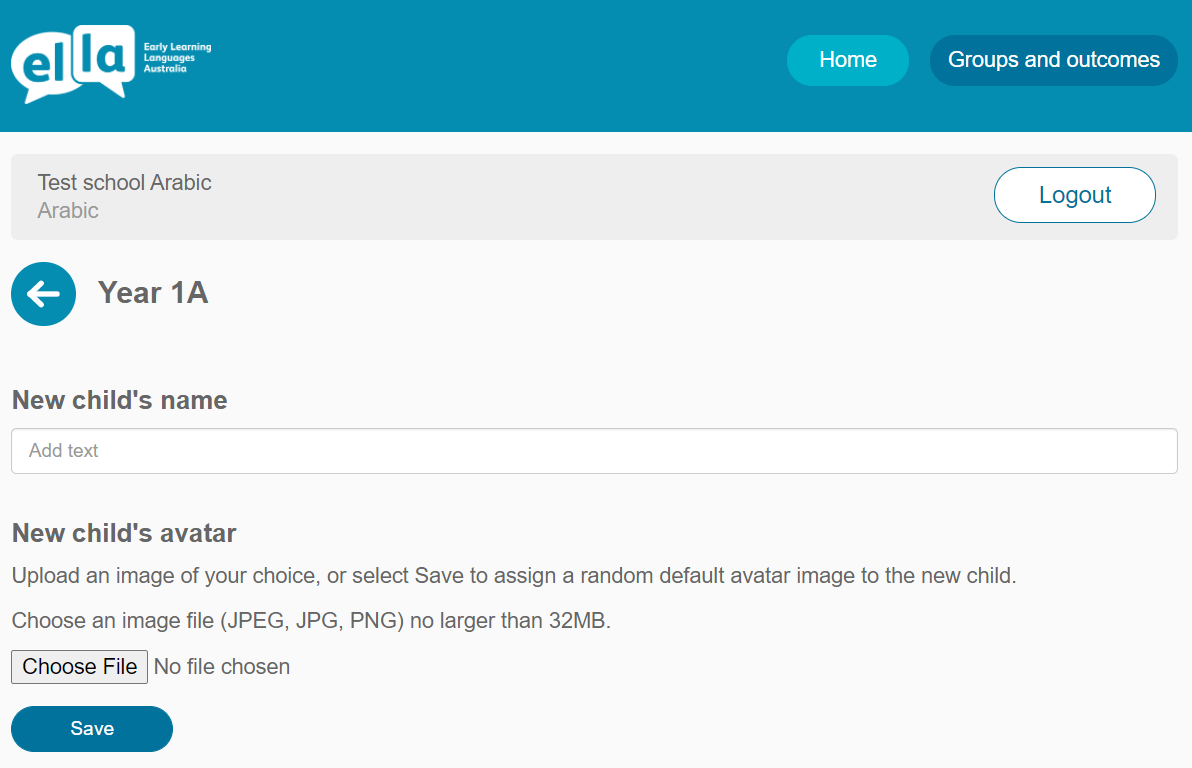
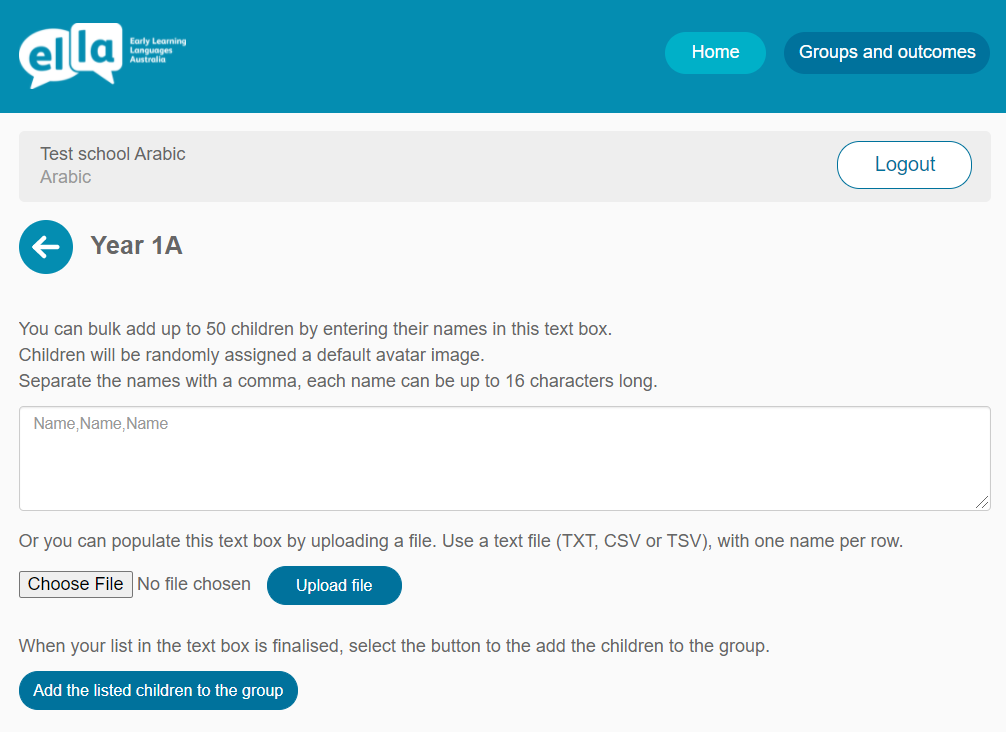
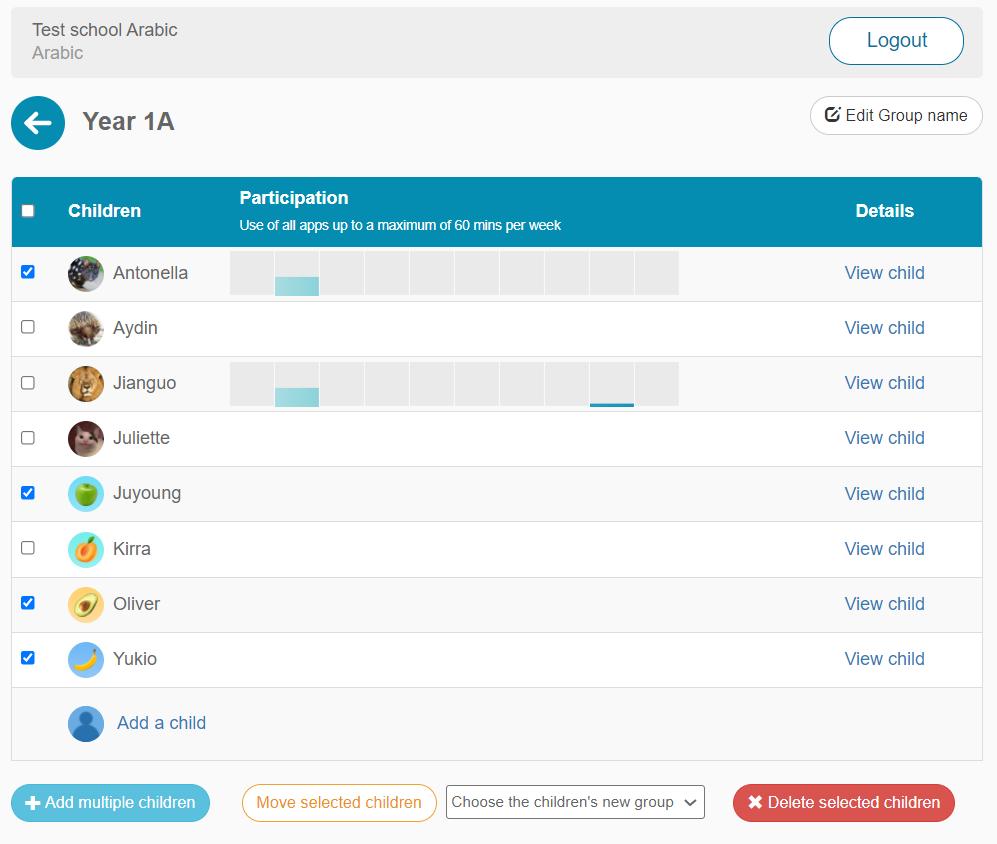
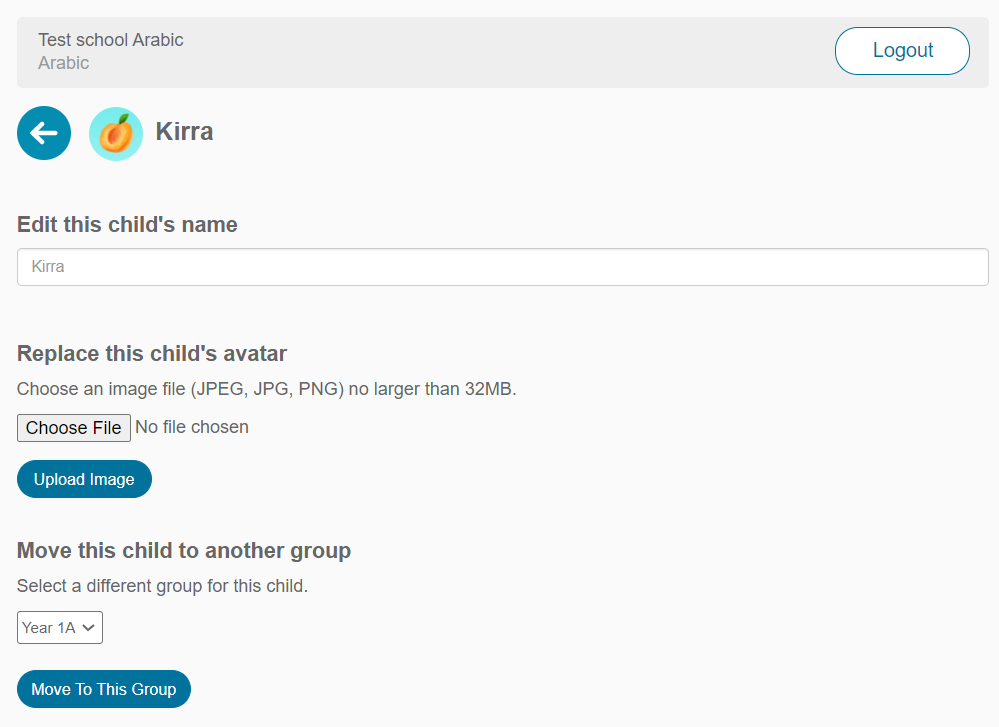
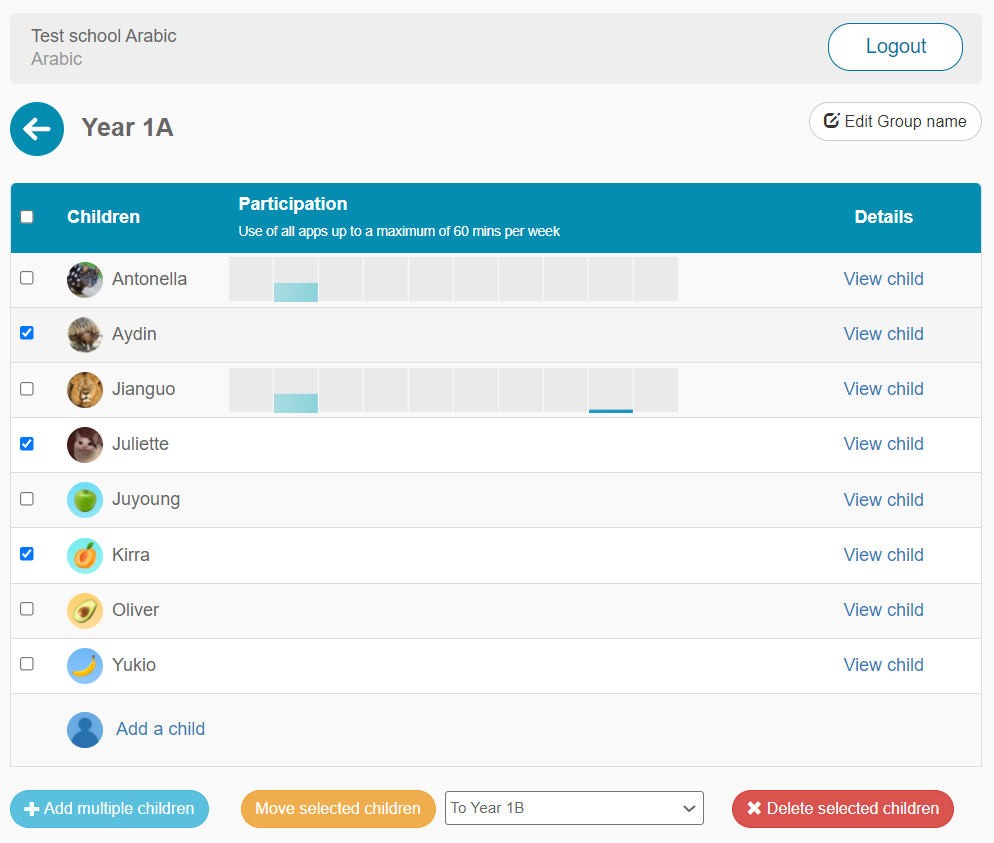
To access the apps and record each student’s usage data, you need to create at least one group. You must also create an avatar for each participating student.

The section below will take you through the steps for creating and managing groups and avatars, as well as addressing any issues you may encounter.

If you have a small number of students participating in ELLA, you will only need to create one group. If you have a larger numbers of students, you may want to create more than one group.

Ella Bayswatersouthps Fullresolution 6

NOTE: Deleting a group will also delete all students within it, their avatars and their data. This action can’t be undone.

Follow these steps to delete a group:

  1. Log in to the Educator Zone on the ELLA website, using your ELLA login details.
  2. Select the tab Groups and outcomes. You will see a list of all the groups you have created.
  3. To delete a particular group, select View group beside the group name.
  4. You will then see a list of all the students’ avatars within the selected group. To delete the whole group, select Delete group from program in the Administration section at the bottom of the screen.

NOTE: If, instead of deleting the group, you wish to remove the group from your devices but continue to access the historical data on the website, select Remove group from devices in the Administration section at the bottom of the screen. This action can’t be undone.

Delete Group F2
Screenshot showing screen after View group is selected, with its list of names and the buttons for two options: Remove group from devices and Delete from program

An avatar is a virtual profile that must be created for each student participating in ELLA. It is used to record usage data for each student. This data includes time spent on each section of the app, progression through the app, and the Australian Curriculum links associated with it.

Ella Try Burnside Previews 86

A student can be added to a group at any time. Students can only be added to one group.

  1. Log in to the Educator Zone on the ELLA website, using your ELLA login details.
  2. Select the tab Groups and outcomes.
  3. Select a group.
  4. Select Add a child.
  5. Enter the child’s name.
  6. Once a child’s name has been added to a group, you will have two options to assign an associated image:
    1. Choose your own image:

Select Choose file and you can upload an image of your own and then select Save to add the avatar to the group. You can add an image from a tablet device photo library, or from a computer.

      1. If accessing the website on a tablet device, you will have the option to take a photo with the tablet’s camera or upload an image from the tablet's photo library. (We suggest that you take or use a photo of an object that has meaning for the child – for example, a favourite toy or a piece of artwork.)
      2. If accessing the website from a computer, you will be able to upload an existing image.
    1. Assign a default avatar image:

Select Save without uploading an image and a random default avatar image will be assigned to the new child. There are 50 default images preloaded to the Educator Zone.

NOTE: Consider your preschool privacy policy when creating avatars. Using images of objects rather than children's faces is highly recommended to ensure privacy.

Add Child F2
Screenshot showing where a new student’s name is entered and then their avatar is uploaded or randomly assigned
  1. Log in to the Educator Zone on the ELLA website, using your ELLA login details.
  2. Select the tab Groups and outcomes.
  3. Select a group.
  4. Select Add multiple children.
  5. There are two ways you can add up to 50 students to a group and assign them a random default avatar image:
    1. Enter their names into the text box. Separate the names with a comma – for example, Antonella,Aydin,Jianguo. Each name can be up to 16 characters long. When you have finalised your list in the text box, select Add the listed children to the group.
    2. Create a text file (TXT, CSV or TSV) with one name per row. Select Choose file to locate your text file and then Upload file to upload the list of names to the text box. If necessary, you can edit the list in the text box. When you have finalised the names, select Add the listed children to the group.
Upload Bulk 2 F2
Screenshot showing two options for adding many names at once (in bulk) to the group, with the Add the listed children to the group button at the bottom left

There are two ways to delete students from a group.

NOTE: Both methods will permanently delete student’s data. Only delete them if you are certain you will not require access to their data again.

To delete an individual student and their avatar from a particular group:

  1. Log in to the Educator Zone on the ELLA website, using your ELLA login details.
  2. Select the tab Groups and outcomes.
  3. Select View group beside the group with the student and avatar that you wish to delete.
  4. You will then see a list of all the avatars in that group.
  5. Select View child beside the student and avatar that you wish to delete.
  6. Select Delete child in the top right-hand corner.
Delete Child F2
Screen reached after selecting View child before deleting a single child and their avatar, with red Delete child button in top right-hand corner

To delete multiple students and their avatars from a particular group:

  1. Log in to the Educator Zone on the ELLA website, using your ELLA login details.
  2. Select the tab Groups and outcomes.
  3. Select View group beside the group with the student and avatar that you wish to delete.
  4. You will then see a list of all the avatars in that group.
  5. Select the checkbox beside the students and avatars you wish to delete. Or, you can activate the ‘select all’ function by checking the checkbox in the heading above the students’ names.
  6. Select Delete selected children.
Delete Bulk F2
Selection of several students for a bulk deletion of their names and avatars, with red Delete selected children button

There are two ways to move students from a group.

  1. To move an individual student and their avatar from a particular group:
    1. Log in to the Educator Zone on the ELLA website, using your ELLA login details.
    2. Select the tab Groups and outcomes.
    3. Select View group beside the group with the student and avatar that you wish to move.
    4. You will then see a list of all the avatars in that group.
    5. Select View child beside the student and avatar that you wish to move.
    6. Select Update details in the top right-hand corner.
    7. Select a different group for the student from the dropdown box and select Move to this group.
Move Child F2
Screenshot of screen that follows selection of one student for viewing and moving to a group selected from a drop-down box

To move multiple students and their avatars from a particular group:

  1. Log in to the Educator Zone on the ELLA website, using your ELLA login details.
  2. Select the tab Groups and outcomes.
  3. Select View group beside the group with the student and avatar that you wish to move.
  4. You will then see a list of all the avatars in that group.
  5. Select a checkbox beside the student and avatars you wish to move. Or, you can activate the ‘select all’ function by checking the checkbox in the heading above the students’ names.
  6. Select a different group for the students from the dropdown box and select Move selected children.
Move Bulk F2
Screenshot showing: several names selected for bulk move to another group, the selection drop-down for group names and the Move selected children button

To make changes to a student’s name or their avatar or to move them to a different group:

  1. Log in to the Educator Zone on the ELLA website, using your ELLA login details.
  2. Select the tab Groups and outcomes.
  3. Select View group beside the group with the student and avatar that you wish to delete.
  4. You will then see a list of all the avatars in that group.
  5. Select View child beside the student and avatar that you wish to delete.
  6. Select Update details in the top right-hand corner.
  7. Select the relevant field and follow the onscreen instructions to update the details. Use Enter on your computer/tablet to save name updates.
Update Child F2
Screenshot of the options for updating one child’s name, avatar and group

The Australian Government Department of Education requires schools to upload their usage data on a monthly basis.

The data is used to:

  • determine requirements for any future ELLA app enhancements
  • assist with targeting support to schools
  • monitor acceptable usage levels of participating schools.

To transmit this data once a month, simply connect all tablets that are used for the ELLA program to WiFi.

NOTE: This data is de-identified before it is supplied to the Department of Education. Please make sure your devices are showing the correct date and time for your location, as this ensures that the uploaded data is accurate.

Dsc 0872

If a student selects the wrong avatar, ask them to switch over to the correct one as soon as possible. It is important for students to use their own avatars so that the usage data is accurately recorded.

Ella Bayswatersouthps Fullresolution 2

Follow these steps to try out, or demo, the ELLA app activities:

  1. When you open the app, you will see all your groups on the Group page.
  2. Select Enter demo mode.

NOTE: It is important to use the demo mode when trying out the apps or demonstrating them to families, so that data collected during demo use is not collated with the students’ data.

Ella Poohbearshouse Previews 102

Have a question or need some help?

Contact the ELLA helpdesk

[email protected] 1800 468 303 (9 am – 4 pm AEST, Mon–Fri)